🔥 Cook Without Electricity — Cook Everything with a Dutch Oven
🍳 1) What is a Dutch oven and why choose it?
The Dutch oven is a thick cast iron pot with a heavy lid. It retains and distributes heat evenly. It can be used for boiling, baking, stewing, and frying with very little fuel.
✅ Advantages over other utensils:
- Keeps heat longer. Saves fuel.
- Cooks evenly even with irregular heat (ideal in emergencies).
- The lid seals well and prevents food from drying out.
- Works on rocket stoves, embers, and even in a solar oven.
- Lasts decades with basic care and can be bought second-hand.
🚨 Built-in precaution
It is heavy and gets very hot. Use thick gloves and stable surfaces. Avoid impacts and thermal shocks (do not pour cold water when it’s red hot).
🛠️ 2) Materials and types: bare vs. enameled
Bare cast iron
✅ Pros:
- More resistant to impacts and direct embers.
- Lid with "lip" to put embers on top (in "camp" models).
- Ideal for bread and stews with heat above and below.
❌ Cons:
- Requires initial seasoning and periodic oil layers.
- Not ideal for very acidic foods for many hours (may affect seasoning).
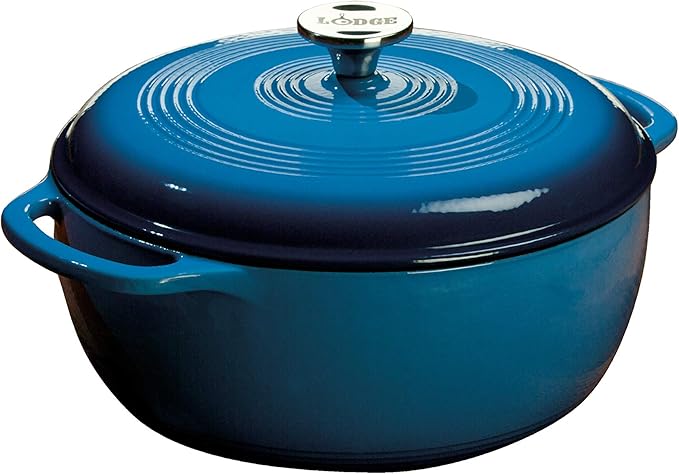
Enameled cast iron
The enamel is a vitreous coating that covers the iron.
✅ Pros:
- No seasoning needed. Easier cleaning.
- Does not react with acids. Good for daily kitchen use.
❌ Cons:
- Less suitable for direct embers on the lid (may stain or get damaged).
- If hit hard, the enamel may chip.
- Usually more expensive and heavier.
📏 Sizes and second-hand purchase
Recommended sizes for families: 5–6 liters (≈5–6 qt) as the "base size". If your family is large or you want to bake tall loaves, 7–8 liters.
Second-hand: look for pieces without cracks. For bare iron, the surface should sound "clear" when tapped gently. For enameled, avoid deep chips. Light rust on bare iron can be cleaned; cracks cannot.
🔧 3) Initial seasoning (bare only) without an electric oven
Seasoning creates a durable non-stick layer. Do it with high smoke point oil (canola, high oleic sunflower, food-grade flaxseed).
📋 Seasoning steps:
- 1Wash with hot water and a little soap the first time. Rinse.
- 2Dry over low heat (rocket stove or mild embers) until no moisture remains.
- 3Coat with a very thin layer of oil inside and out (including the lid). Remove excess with paper. The key is thin: if it looks greasy, there's too much.
- 4Heat on the rocket stove or over moderate embers for 45–60 min. It should barely smoke. If it smokes a lot, lower the heat or raise the pot with a stand.
- 5Cool slowly. Repeat 1–2 more times for a more resistant film.
🌡️ Useful sign: if a drop of water "dances" and evaporates quickly, the body is at the right range. Avoid intense direct heat to a single area; rotate the pot for evenness.
🔥 4) Daily use in three scenarios
4.1 On a rocket stove
- Preheat the empty oven 5–8 min with moderate flame.
- Adjust power: high flame to boil; low flame to keep warm.
- Diffuser: if the center heats too much, place a metal ring or rack between the flame and the bottom.
- Rotate the pot every 10–15 min for evenness.
- For baking (quick bread, simple cake), use embers on top of the lid if the model has a lip; if not, cover the lid with hot sand or small stones heated separately.
🚨 Built-in precaution: the rocket stove consumes oxygen. Cook outdoors or in a ventilated space.
4.2 On embers (heat above and below)
Practical rule: ⅓ of the heat below and ⅔ above. This prevents burning the bottom.
| Dutch Oven Size | Embers Below | Embers Above | Recommended Rotation |
|---|---|---|---|
| 10" (25 cm) | 7 embers | 14 embers | Every 15 min |
| 12" (30 cm) | 9-10 embers | 16-18 embers | Every 15 min |
⏰ Maintenance: Renew embers every 30–40 min. Rotate the pot 90° and the lid another 90° every 15 min for even distribution.
🚨 Built-in precaution: use a lid lifter and gloves. Keep children and pets away from embers.
4.3 Solar oven adaptation
- Paint (if bare without coating) or use a dark exterior; black absorbs better. Light enamel cooks, but slower.
- Preheat the solar oven 20–30 min.
- Place the closed Dutch oven inside.
- Times: estimate 2–3× slower than embers. Ideal for stews, soaked legumes, and slow breads.
- Keep the reflector pointed at the sun. Do not open often to avoid losing heat.
🍲 5) Basic and versatile recipes
🍞 Simple rustic bread (no long kneading)
Ingredients: 500 g flour, 8–10 g salt, 5 g dry yeast, 350 ml water.
Steps:
- Mix ingredients until combined. Rest 1–2 h.
- Preheat the Dutch oven 20 min (embers above and below).
- Place the dough on baking paper inside the pot.
- Cover. 25–35 min with more embers on top than below.
- Uncover 10 more min for crust. In solar oven, double the times.
🌱 Quick lentil stew
Ingredients: 1 cup soaked lentils, 1 onion, 1 carrot, 1 tomato, 1 tbsp oil, salt and spices.
Steps:
- Sauté onion and carrot with oil.
- Add lentils and tomato. Cover with water 2–3 fingers above.
- Cover. Medium-low heat 25–35 min. Adjust salt.
- Rest 10 min with the heat off to thicken.
🐔 Basic chicken stew
Ingredients: 1 kg thighs, 2 potatoes, 1 onion, 2 cloves garlic, 1 bay leaf, salt.
Steps:
- Brown the chicken 5–7 min per side.
- Add onion and garlic. Stir 2 min.
- Add potatoes, bay leaf, and water until partially covered.
- Cover and cook gently 35–45 min. Rest 10 min.
🧽 6) Cleaning and minimal maintenance
Bare: let it cool. Remove residues with a wooden spatula. Pour a little hot water, scrub with a brush. Dry over low heat and coat with a thin film of oil while warm.
Enameled: you can use a little soap and a soft sponge. Avoid impacts.
Light rust (bare): scrub with fine steel wool, rinse, dry, and re-season.
Storage: place a paper towel inside to absorb moisture. Store slightly open.
⚠️ Avoid: long soaking, thermal shocks, impacts, and aggressive metal utensils.
💡 7) Mini tricks to save fuel and prevent sticking
- Always preheat the iron over medium heat.
- Thin layer of oil before sticky recipes.
- Baking paper under breads and cakes.
- Heat funnels: surround the base with a "ring" of embers, not just below.
- Thermal inertia: turn off before finishing; the iron completes the cooking.
- Do not open the lid every minute; each opening steals heat.
- Rotate pot and lid separately 90° every 15 min with embers for evenness.
- Stacking: if using two Dutch ovens, the top one acts as a "hot lid" for the bottom one.
- Acids (tomato, vinegar): in bare, short cooking. For long, use enameled.
🛒 8) Recommended models to search on Amazon


“PrepperFamily.org participates in the Amazon Affiliates Program. Using this link contributes to the platform at no additional cost to you. Thank you for supporting this community.”
Sources
- Utah State University Extension. Dutch Oven Cooking. Fact Sheet, 2010.
- University of Idaho Extension. Dutch Oven Cooking: Project Manual / Unit 1.
- Chiu, C., et al. Hydrophobic Properties of Polymer Films on Cast Iron Seasoned with Cooking Oils. UCLA eScholarship, 2020.
🚀 9) Immediate action
If you can only do one thing today, do this: get a 5–6 liter Dutch oven, clean it and (if bare) season it with a very thin layer of oil, and prepare a lentil stew over moderate heat.
With just one utensil you’ll have soup, bread, and stew for your family, even without electricity.